Ever tripped over a wave in your carpet? That pesky buckling can be more than just an eyesore; it's a safety hazard waiting to happen. But don't worry, you don't necessarily need to call in a professional. Fixing buckled carpet is often a DIY project you can tackle yourself with a little patience and the right tools. Let's explore how to get your carpet smooth and flat again! Why is My Carpet Buckling? Understanding the Root Causes Before you dive into fixing the problem, it's helpful to understand why your carpet is buckling in the first place. Identifying the cause will not only help you choose the right solution but also prevent the problem from recurring. Common Culprits Behind Carpet Buckling: Improper Installation: This is the most frequent offender. If the carpet wasn't stretched correctly during installation, it's prone to loosening and buckling over time. Humidity: Excessive moisture can cause the carpet fibers and...
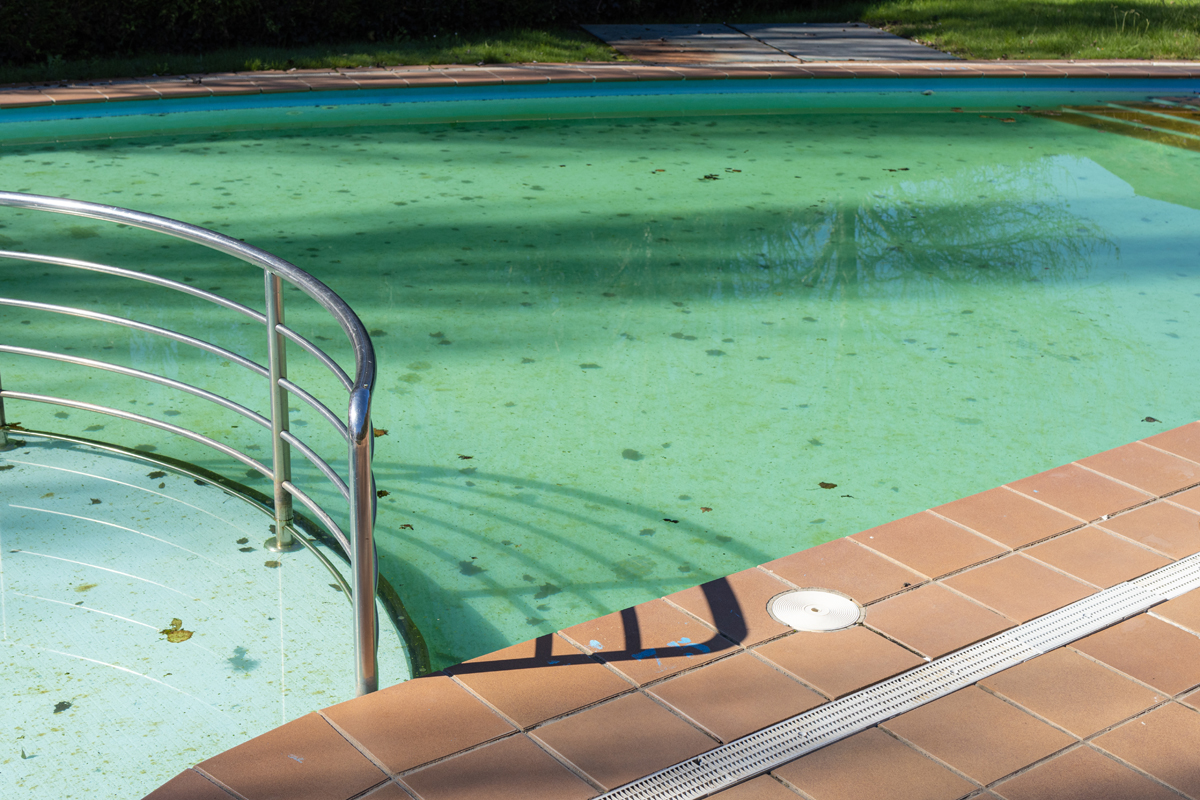
Uh oh, your sparkling oasis has turned into a swamp thing! Green pool water can be alarming, but don't panic. It's a common problem and, thankfully, usually quite fixable. Let's dive in and figure out how to get your pool back to its beautiful, blue self.
Understanding Why Your Pool Water Turned Green
Before we jump into the "how," it's crucial to understand the why.Green pool water is almost always caused by the presence of algae. Algae are microscopic plants that thrive in pool water when the conditions are just right – or, more accurately, just wrong. Factors contributing to algae growth include:
- Insufficient Sanitizer Levels:Chlorine, bromine, or other sanitizers are designed to kill algae and bacteria. When these levels drop too low, algae can flourish. This is often the #1 reason for green water.
- Poor Water Circulation:Stagnant water provides a breeding ground for algae. A properly functioning pump and filter system are essential.
- Imbalanced Water Chemistry:p H, alkalinity, and calcium hardness all play a role in water quality. When these are out of balance, sanitizer becomes less effective, and algae can thrive.
- High Phosphate Levels:Phosphates are a food source for algae. They can enter your pool from various sources, like decaying leaves, fertilizers, and even some pool chemicals.
- Sunlight:Algae needs sunlight to photosynthesize and grow. That's why you often see green pool water problems in warmer months.
Think of your pool like a delicate ecosystem. When one element is off, it can throw the whole thing out of whack. The key to preventing green pool water is maintaining a consistently balanced and sanitized environment. Prevention, as they say, is much easier than the cure!
How to Fix Green Pool Water: A Step-by-Step Guide
Now for the good part – the solution! Getting rid of green pool water involves a multi-step process. This isn’t a quick overnight fix in many cases, so be prepared to put in a little elbow grease (or hire a pool professional if you're feeling overwhelmed).
Step 1: Test and Balance Your Water
This isthemost important first step. You need accurate data on your water's chemistry before you can take any effective action. Use a reliable test kit (liquid test kits are generally more accurate than test strips) to measure the following:
- p H:Aim for a range of 7.2-7.8.
- Alkalinity:Ideal range is 80-120 ppm (parts per million).
- Calcium Hardness:Recommended range is 200-400 ppm.
- Cyanuric Acid (CYA):This is a stabilizer that protects chlorine from sunlight. Target level depends on your chlorine type, but typically 30-50 ppm for manually chlorinated pools.
Adjust these levels as needed using appropriate pool chemicals. Always follow the manufacturer's instructions carefully. Adding chemicals in the wrong order or quantity can be dangerous and ineffective. For example, if your alkalinity is low, raising it first helps stabilize the p H. Think of alkalinity as the "buffer" for p H changes. Too low, and the p H will bounce around wildly.
A case study from a large water park showed that religiously testing water chemistrytwicedaily and making small, incremental adjustments, instead of large corrections, drastically reduced algae blooms and chemical costs. The consistency was key!
Step 2: Brush, Skim, and Vacuum the Pool Thoroughly
Before shocking your pool, you need to physically remove as much algae as possible. Use a sturdy pool brush to scrub the walls and floor of the pool, dislodging algae growth. Pay special attention to corners and crevices where algae tend to accumulate.
After brushing, use a skimmer net to remove any floating debris, such as leaves, twigs, and dead algae. Then, vacuum the pool to remove settled algae and debris from the bottom. If your pool has a sand filter, backwash it after vacuuming to remove the collected debris from the filter.
Step 3: Shock the Pool (Superchlorinate)
Shocking the pool involves adding a large dose of chlorine to kill the remaining algae and bacteria. The amount of shock needed depends on the severity of the algae bloom. A good rule of thumb is to useat least 3 times the normal chlorine level. Refer to your shock product’s instructions for specific dosage recommendations.
There are different types of pool shock available:
- Calcium Hypochlorite (Cal Hypo):A powerful and fast-acting shock, but it can increase calcium hardness.
- Dichlor:Another effective shock, but it can increase cyanuric acid (CYA) levels.
- Non-Chlorine Shock (Potassium Monopersulfate):This shock oxidizes organic contaminants and can help clear cloudy water, but it doesn't kill algae like chlorine shock does. It's best used in conjunction with chlorine shock or as a maintenance treatment.
Important Safety Note: Always add shock to water, never the other way around. Wear gloves and eye protection when handling pool chemicals. Add shock in the evening or at night to minimize chlorine loss from sunlight. Run your pump and filter continuously after shocking the pool.
Step 4: Run Your Filter Continuously
After shocking the pool, run your filter24/7 until the water clears. This helps remove dead algae and debris from the water. Regularly backwash or clean your filter (depending on the type) to prevent it from becoming clogged.
Think of your filter as the kidneys of your pool. It's constantly working to clean and purify the water. Giving it a break during a green pool situation hinders its ability to do its job effectively.
Step 5: Test and Adjust Water Chemistry Again
After 24-48 hours of continuous filtration, test your water chemistry again. The p H, alkalinity, and chlorine levels may have shifted during the shocking process. Adjust as needed to bring them back into the ideal ranges.
At this stage, you should also test for phosphates. If phosphate levels are high (above 300 ppb), use a phosphate remover to reduce them. Reducing phosphates starves algae and makes it harder for them to return.
Step 6: Clarify and Vacuum (If Needed)
Even after shocking and filtering, the water may still appear cloudy due to dead algae particles. Use a pool clarifier to help these particles clump together, making them easier to filter out. Vacuum the pool again after using a clarifier.
Step 7: Prevention is Key
Once your pool water is clear, it's essential to maintain a consistent water chemistry and sanitation routine to prevent future algae blooms. Here are some tips:
- Regularly Test and Balance Your Water:Test your water chemistry at least once a week and adjust as needed.
- Maintain Proper Sanitizer Levels:Keep your chlorine or bromine levels within the recommended range.
- Run Your Filter Daily:Run your filter for at least 8 hours a day, or preferably 24/7 during peak swimming season.
- Brush and Skim Regularly:Brush the pool walls and floor and skim the surface to remove debris.
- Shock Your Pool Regularly:Shock your pool at least once a week, or more often during periods of heavy use or hot weather.
- Use an Algaecide:As a preventative measure, use a maintenance algaecide according to the manufacturer's instructions.
- Control Phosphate Levels:Regularly test for phosphates and use a phosphate remover if levels are high.
- Maintain proper CYA levels. Too little and your chlorine burns off; too much, and it becomes ineffective.
Dealing with Stubborn Green Pool Water
Sometimes, despite your best efforts, green pool water can be stubborn. Here are a few troubleshooting tips:
High CYA Levels
If your cyanuric acid (CYA) levels are too high, it can render your chlorine ineffective. The only way to lower CYA is to partially drain your pool and refill it with fresh water. Consider using a CYA reducer product, but these can be expensive and may not be completely effective.
Resistant Algae Strains
Some algae strains are resistant to chlorine. In this case, you may need to use a different type of algaecide, such as a copper-based algaecide or a quaternary ammonium algaecide. Always follow the manufacturer's instructions carefully when using algaecides.
Filter Problems
A malfunctioning or undersized filter can contribute to algae problems. Make sure your filter is properly sized for your pool and that it's functioning correctly. Consider upgrading your filter if necessary.
When to Call a Professional
If you've tried everything and your pool water is still green, it may be time to call a pool professional. They have the expertise and equipment to diagnose and fix complex pool problems. A pool professional can also help you develop a customized maintenance plan to prevent future algae blooms.
Fixing green pool water requires a methodical approach, persistence, and a bit of chemistry knowledge. By following these steps and maintaining a consistent water chemistry routine, you can keep your pool water sparkling clean and enjoy a refreshing swim all season long.