Ever tripped over a wave in your carpet? That pesky buckling can be more than just an eyesore; it's a safety hazard waiting to happen. But don't worry, you don't necessarily need to call in a professional. Fixing buckled carpet is often a DIY project you can tackle yourself with a little patience and the right tools. Let's explore how to get your carpet smooth and flat again! Why is My Carpet Buckling? Understanding the Root Causes Before you dive into fixing the problem, it's helpful to understand why your carpet is buckling in the first place. Identifying the cause will not only help you choose the right solution but also prevent the problem from recurring. Common Culprits Behind Carpet Buckling: Improper Installation: This is the most frequent offender. If the carpet wasn't stretched correctly during installation, it's prone to loosening and buckling over time. Humidity: Excessive moisture can cause the carpet fibers and...
That telltale hissing sound, the sudden drop in engine performance, and the dreaded check engine light – all potential signs of a cracked manifold. Don’t panic! While a cracked manifold can seem like a major headache, understanding the problem and exploring your repair options can save you a lot of money and get your vehicle back on the road.
Understanding Cracked Manifolds and Their Impact
Before diving into the "how-to" aspects of fixing a cracked manifold, let's establish a solid understanding of what a manifold is and the consequences of it being cracked. The manifold, whether intake or exhaust, is a crucial component of your engine. It's responsible for directing air and fuel mixture into the cylinders (intake manifold) or channeling exhaust gases away from the cylinders (exhaust manifold). A crack disrupts this flow, leading to a cascade of problems.
What is a Manifold?
Think of the manifold as the engine's respiratory system. Theintake manifold evenly distributes the air/fuel mixture to each cylinder, ensuring efficient combustion. Theexhaust manifold collects the burnt gases from each cylinder and channels them to the exhaust system, where they are treated by the catalytic converter before being released into the atmosphere.
Consequences of a Cracked Manifold
A crack in either manifold presents a significant challenge. For theintake manifold, a crack allows unmetered air to enter the engine. This leans out the air/fuel mixture, leading to:
- Rough idling
- Reduced fuel economy
- Poor acceleration
- Possible engine misfires
For theexhaust manifold, the crack lets exhaust gases escape. This can result in:
- Loud hissing or ticking noises
- Reduced engine power
- Poor fuel economy
- Potential for dangerous exhaust fumes to enter the cabin
- Check engine light activation
Furthermore, escaping exhaust gases are extremely hot and can damage nearby components, such as wiring harnesses or hoses. In some cases, a cracked exhaust manifold can even lead to a fire hazard. So, addressing this issue promptly is crucial.
Diagnosing a Cracked Manifold: Confirming the Problem
Before you start researching how to repair a cracked manifold, you need to be certain that's actually the issue. Several symptoms can point to a cracked manifold, but it's best to confirm the diagnosis before proceeding with any repairs. Here are some common diagnostic methods:
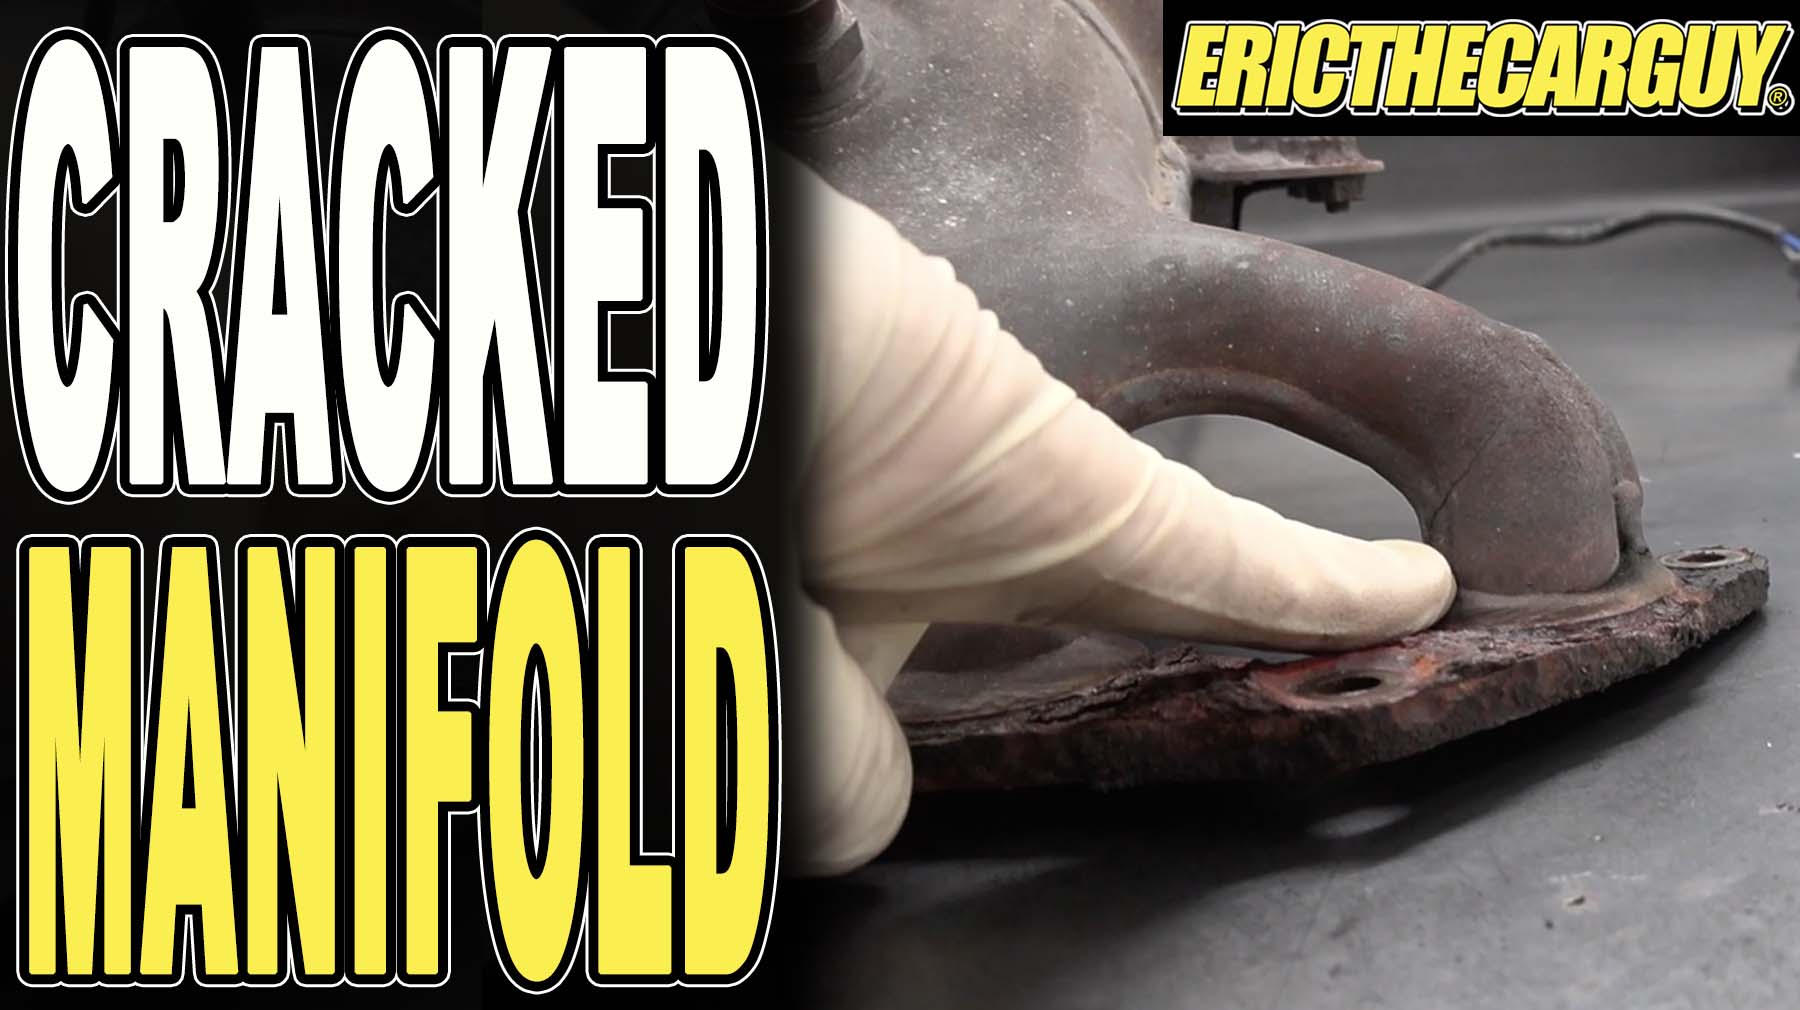
Visual Inspection
The first step is always a thorough visual inspection. Look for visible cracks, especially around welds or areas exposed to high heat. Use a flashlight to get a better view, and consider using a mechanic's mirror to access hard-to-reach areas. Pay close attention to:
- Areas around the manifold's flanges (where it bolts to the engine or exhaust system)
- Welds, especially on aftermarket manifolds
- Areas close to the engine block, where heat stress is highest
Sometimes, you might see soot or carbon deposits around the crack, which is a telltale sign of escaping exhaust gases. However, small cracks can be difficult to spot with the naked eye.
The Soap and Water Test
This is a simple and effective method for locating leaks, especially on the exhaust manifold. With the engine cool, mix a solution of soapy water (dish soap works well). Spray or brush the solution onto the suspect area. Start the engine and observe the area for bubbles. If bubbles form, it indicates escaping gas from a crack.Caution:Do not spray water on a hot exhaust manifold as this could cause severe damage or injury. Make sure the engine is completely cool before attempting this test.
Listening for Leaks
Sometimes, you can hear a hissing or ticking sound emanating from the area around the manifold, especially when the engine is cold. This sound is often more pronounced on startup. Use a mechanic's stethoscope or a long screwdriver (held to your ear while touching the engine – be careful of moving parts!) to pinpoint the source of the noise. This method is best used in conjunction with other diagnostic techniques.
Check Engine Light and OBD-II Codes
A cracked manifold can trigger the check engine light and store diagnostic trouble codes (DTCs) in your vehicle's computer. Common codes associated with manifold leaks include:
- P0171: System Too Lean (Bank 1)
- P0174: System Too Lean (Bank 2)
- P0300: Random Misfire Detected
- P0420: Catalyst System Efficiency Below Threshold (Bank 1) -This code might appear if the cracked manifold has damaged the catalytic converter.
Use an OBD-II scanner to retrieve the codes and research their meaning. While these codes can indicate a manifold leak, they can also be caused by other issues, so further diagnosis is necessary.
Options for How to Fix a Cracked Manifold
Once you've confirmed that you have a cracked manifold, you have several options for how to go about fixing it, each with its own pros and cons. The best choice will depend on the severity of the crack, your budget, your mechanical skills, and the type of vehicle you own.
Option 1: Welding the Crack
Welding a cracked manifold is a common and often cost-effective solution, particularly for cast iron manifolds. However, it requires specific skills and equipment. Here's a breakdown:
Pros:
- Potentially cheaper than replacing the manifold.
- Can restore the original manifold if it's a rare or expensive part.
Cons:
- Requires welding skills and equipment (e.g., MIG, TIG, or stick welder).
- Cast iron can be difficult to weld, requiring preheating and specialized welding rods.
- The weld might crack again if not done properly, especially if the manifold is still subjected to high stress.
Welding Process (Simplified):
- Preparation: Thoroughly clean the area around the crack with a wire brush or grinder. Remove any rust, paint, or debris. Bevel the edges of the crack to create a V-shaped groove for the weld.
- Preheating (for cast iron): Preheat the manifold to a temperature of 400-600°F (200-300°C) to prevent cracking during welding. Use a propane torch or a dedicated preheating oven.
- Welding: Use appropriate welding rods or wire for the manifold material (e.g., nickel-based rods for cast iron). Weld the crack in short, overlapping beads, allowing the metal to cool slightly between passes.
- Slow Cooling (for cast iron): After welding, allow the manifold to cool down slowly to prevent stress cracking. Wrap it in a welding blanket or bury it in sand.
- Grinding and Finishing: Grind down the weld to smooth the surface and remove any imperfections.
Important Note: Welding a cracked manifold is not a permanent solution in many cases, especially if the manifold is still under significant stress. Consider reinforcing the weld with a patch or additional bracing.
Option 2: Using a Manifold Repair Kit
Several manifold repair kits are available on the market, designed to patch or seal cracks. These kits typically involve using epoxy or other specialized compounds to fill the crack. Here's a look at this method:
Pros:
- Relatively easy and inexpensive.
- Doesn't require welding skills or equipment.
Cons:
- Generally a temporary fix.
- Not suitable for large or severe cracks.
- The repair compound may not withstand high temperatures or vibrations for long.
Using a Manifold Repair Kit (General Steps):
- Cleaning: Thoroughly clean the area around the crack with a wire brush or grinder. Remove any rust, paint, or debris.
- Application: Apply the repair compound according to the manufacturer's instructions. This usually involves mixing the compound and applying it to the crack.
- Curing: Allow the compound to cure completely, as specified in the instructions. This may take several hours or even overnight.
- Sanding: Sand the repaired area to smooth the surface and remove any excess compound.
Warning: Manifold repair kits are best suited for small cracks or as a temporary fix to get you by until you can replace the manifold. They are not a substitute for welding or replacement in most cases.
Option 3: Replacing the Manifold
Replacing the cracked manifold is the most reliable and permanent solution. While it can be more expensive than welding or using a repair kit, it ensures that the problem is fully resolved. Here's what to consider:
Pros:
- Permanent solution to the problem.
- Restores the manifold to its original condition.
- Can improve engine performance if the old manifold was severely cracked.
Cons:
- Can be more expensive than welding or using a repair kit.
- Requires mechanical skills and tools.
- May involve removing other components to access the manifold.
Replacing the Manifold (General Steps):
- Preparation: Disconnect the negative battery cable. Allow the engine to cool completely. Gather the necessary tools, including sockets, wrenches, extensions, and a torque wrench.
- Removal: Remove any components that are blocking access to the manifold, such as air intake components, heat shields, or sensors. Disconnect any wiring or hoses connected to the manifold.
- Unbolting: Carefully unbolt the manifold from the engine block or exhaust system. Be prepared for rusty or corroded bolts, which may require penetrating oil or a breaker bar.
- Installation: Install the new manifold, using new gaskets. Tighten the bolts to the manufacturer's specified torque, following the correct tightening sequence.
- Reassembly: Reconnect any wiring or hoses that were disconnected. Reinstall any components that were removed to access the manifold.
- Final Checks: Double-check all connections. Start the engine and listen for leaks. Monitor the check engine light and check for any new DTCs.
Tip: When replacing a manifold, always use new gaskets to ensure a proper seal. Use anti-seize compound on the bolt threads to prevent corrosion and make future removal easier. Follow the manufacturer's recommended torque specifications and tightening sequence to avoid warping or damaging the manifold.
Tools You'll Need to Fix a Cracked Manifold
Regardless of which repair method you choose, having the right tools on hand will make the job much easier and safer. Here's a list of essential tools:
- Sockets and Wrenches: A variety of metric or SAE sockets and wrenches to fit the manifold bolts and other components.
- Torque Wrench: Essential for tightening the manifold bolts to the manufacturer's specified torque.
- Penetrating Oil: To loosen rusty or corroded bolts.
- Wire Brush or Grinder: To clean the area around the crack.
- Welding Equipment (if welding): MIG, TIG, or stick welder, welding helmet, gloves, and appropriate welding rods or wire.
- Mechanic's Gloves: To protect your hands.
- Safety Glasses: To protect your eyes.
- Flashlight or Work Light: To illuminate the work area.
- Mechanic's Mirror: To access hard-to-reach areas.
- OBD-II Scanner: To retrieve diagnostic trouble codes (DTCs).
- Jack and Jack Stands (if needed): To safely lift the vehicle.
Safety Precautions When Fixing a Cracked Manifold
Working on your vehicle can be dangerous if you don't take the necessary precautions. Here are some important safety tips to keep in mind when fixing a cracked manifold:
- Disconnect the negative battery cable: This will prevent electrical shocks and accidental starting of the engine.
- Allow the engine to cool completely: Exhaust manifolds can get extremely hot, so wait until the engine is cool to the touch before working on it.
- Wear safety glasses and gloves: To protect your eyes and hands from debris and chemicals.
- Work in a well-ventilated area: Exhaust fumes can be harmful, so make sure you have adequate ventilation.
- Use jack stands when lifting the vehicle: Never work under a vehicle that is supported only by a jack.
- Follow the manufacturer's instructions: Always read and follow the instructions for any repair kits or replacement parts you are using.
- If you are not comfortable performing the repair yourself, take your vehicle to a qualified mechanic.
Preventing Future Manifold Cracks
While some manifold cracks are unavoidable due to wear and tear, certain factors can contribute to their occurrence. Here are some tips to help prevent future manifold cracks:
- Avoid sudden temperature changes: Don't drive through deep puddles or wash your engine when it's hot.
- Ensure proper engine cooling: Overheating can put excessive stress on the manifold.
- Address engine misfires promptly: Misfires can cause excessive heat buildup in the exhaust manifold.
- Use quality replacement parts: Avoid using cheap, low-quality manifolds that are more prone to cracking.
- Regularly inspect your exhaust system: Look for signs of leaks or damage that could put stress on the manifold.
By understanding the causes of cracked manifolds and taking preventative measures, you can help extend the life of your engine and avoid costly repairs in the future.
In conclusion, knowing how to address a cracked manifold empowers you to make informed decisions about repair options and maintain your vehicle efficiently. Remember safety first, and when in doubt, consult a professional mechanic.