Ever tripped over a wave in your carpet? That pesky buckling can be more than just an eyesore; it's a safety hazard waiting to happen. But don't worry, you don't necessarily need to call in a professional. Fixing buckled carpet is often a DIY project you can tackle yourself with a little patience and the right tools. Let's explore how to get your carpet smooth and flat again! Why is My Carpet Buckling? Understanding the Root Causes Before you dive into fixing the problem, it's helpful to understand why your carpet is buckling in the first place. Identifying the cause will not only help you choose the right solution but also prevent the problem from recurring. Common Culprits Behind Carpet Buckling: Improper Installation: This is the most frequent offender. If the carpet wasn't stretched correctly during installation, it's prone to loosening and buckling over time. Humidity: Excessive moisture can cause the carpet fibers and...
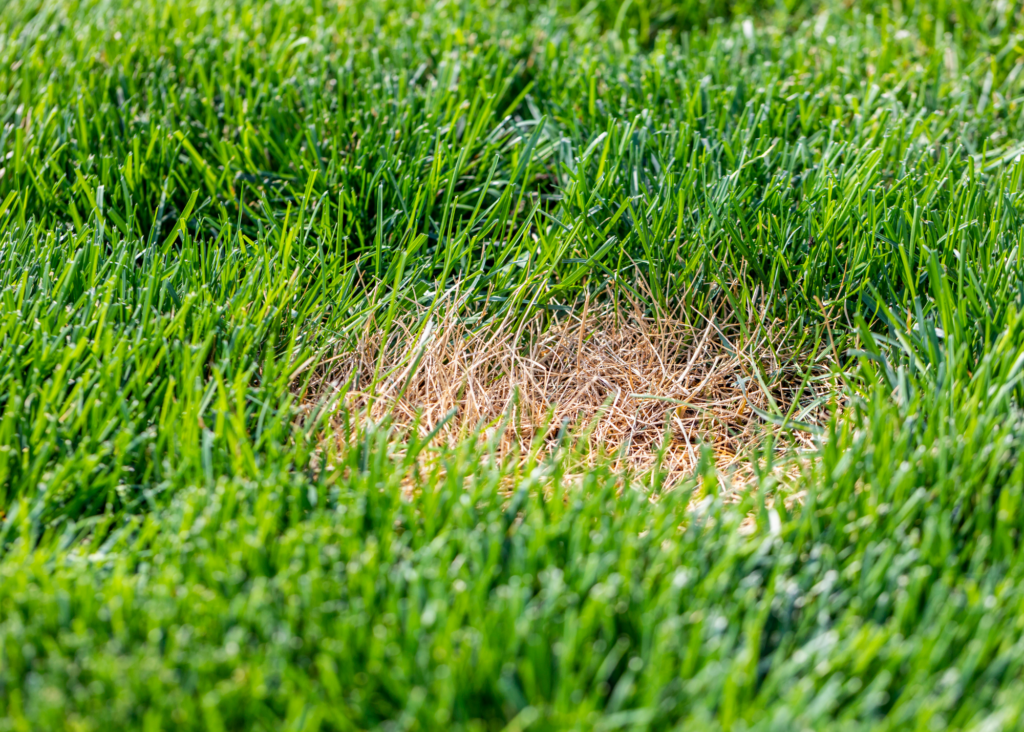
Seeing brown spots pop up on your lush green lawn can be disheartening. It's like a painter splattering the perfect canvas with unwanted blemishes. But don't despair! A patchy lawn isn't a life sentence for your yard. With a little detective work and some elbow grease, you can diagnose the cause and nurse your grass back to health. Let's explore the common culprits behind these unsightly spots and, more importantly, how to fix those brown spots in your yard.
Identifying the Culprit: Why Are There Brown Spots in My Yard?
Before you can effectively treat your lawn, you need to understand what's causing those pesky brown spots. Think of yourself as a lawn detective, gathering clues to solve the mystery. Here are some of the most common suspects:
Grubs: Underground Attackers
Grubs are the larvae of beetles, and they are some of the worst offenders when it comes to lawn damage. These creamy white, C-shaped creatures feast on the roots of your grass, effectively cutting off its water and nutrient supply. The result? Patches of dead or dying grass that easily pull up from the soil. One telltale sign is that your lawn feels spongy underfoot, as if the grass isn't firmly rooted.
How to identify a grub problem: Dig up a one-foot-square section of your lawn in an affected area. If you find more than 5-6 grubs, you likely have an infestation that needs treatment. You can also check for increased bird or skunk activity, as they love to feed on grubs.
How to fix it: Several options are available. You can use chemical insecticides specifically designed to kill grubs. Apply these in the late summer or early fall when the grubs are small and close to the surface. Another option is to use beneficial nematodes, microscopic worms that parasitize grubs. These are a more natural and environmentally friendly approach. Finally, maintaining a healthy lawn through proper watering and fertilization can make it less susceptible to grub damage.
Fungal Diseases: A Spotty Situation
Various fungal diseases can cause brown spots on your lawn. These diseases thrive in humid conditions and can spread rapidly. Some common culprits include:
- Brown Patch: Characterized by circular or irregular patches of brown grass, often with a darker, smoky ring around the perimeter.
- Dollar Spot: Small, circular spots about the size of a silver dollar.
- Red Thread: Pink or red thread-like strands visible on the grass blades.
How to identify fungal diseases: Close examination of the grass blades can reveal the characteristic signs of each disease. You might see lesions, discoloration, or the presence of fungal growth.
How to fix it: Improving air circulation is key to preventing fungal diseases. Prune trees and shrubs to allow more sunlight to reach your lawn. Avoid overwatering, and water in the morning so the grass has time to dry before nightfall. Fungicides can be used to treat severe cases, but it's important to identify the specific disease to choose the right product. Improving drainage and soil aeration can also significantly reduce the risk of fungal infections.
Pet Urine: A Nitrogen Overload
If you have dogs, their urine could be the cause of your brown spots. Dog urine is high in nitrogen, which can burn the grass. Female dogs tend to cause more damage because they squat, concentrating the urine in one spot. Male dogs spread their urine around to mark, which lessens the impact in any one area.
How to identify pet urine damage: The spots are usually circular with a ring of green, lush grass around them. This is because the diluted nitrogen on the edges acts as a fertilizer.
How to fix it: The best solution is prevention. Encourage your dog to urinate in a designated area, away from your lawn. Immediately after your dog urinates on the grass, thoroughly water the area to dilute the nitrogen. You can also try dietary supplements for your dog that reduce the nitrogen content of their urine. Re-seeding damaged areas with a grass variety that is more tolerant of high nitrogen levels may also help.
Dull Mower Blades: Tearing, Not Cutting
Believe it or not, your mower could be causing brown spots. Dull mower blades tear the grass blades instead of cutting them cleanly. This creates jagged edges that lose moisture and become susceptible to disease, leading to brown tips and eventually, brown spots.
How to identify dull mower blade damage: Examine the freshly cut tips of your grass. If they appear torn or shredded rather than cleanly cut, your blades are likely dull.
How to fix it: Sharpen your mower blades regularly. You can do this yourself with a metal file and vice, or you can take them to a professional. Aim to sharpen your blades at least once or twice a year, depending on how often you mow. Also, ensure you mow at the correct height for your grass type. Mowing too short can stress the grass and make it more susceptible to damage.
Compacted Soil: Suffocating Roots
Compacted soil prevents water, air, and nutrients from reaching the roots of your grass. Over time, this can lead to weakened grass and the development of brown spots. High traffic areas, such as where children play or where you frequently walk, are particularly susceptible to compaction.
How to identify compacted soil: The soil will be hard and dense, making it difficult to push a screwdriver or other tool into the ground. Water may also pool on the surface after rain, rather than soaking in.
How to fix it: Aerating your lawn is the best way to alleviate soil compaction. This involves creating small holes in the soil to allow air, water, and nutrients to penetrate to the roots. You can use a core aerator, which removes plugs of soil, or a spike aerator, which simply pokes holes in the ground. Aerate your lawn in the fall or spring when the grass is actively growing. After aerating, consider topdressing with compost to improve soil structure and fertility.
Repairing the Damage: How to Fix Existing Brown Spots
Once you've identified the cause of the brown spots, it's time to take action. Here's a step-by-step guide to repairing the damage:
Step 1: Remove the Dead Grass
Use a rake to remove any dead grass and debris from the affected area. This will help create a clean surface for new grass to grow.
Step 2: Loosen the Soil
Use a garden fork or tiller to loosen the soil in the area. This will improve drainage and allow the new grass roots to penetrate easily. Break up any large clumps of soil.
Step 3: Add Topsoil and Compost
Mix equal parts topsoil and compost and spread a thin layer over the prepared area. This will provide a nutrient-rich growing medium for the new grass.
Step 4: Seed or Sod
Choose a grass seed or sod that is appropriate for your climate and soil conditions. Follow the instructions on the seed packet or sod roll for proper planting. When seeding, gently rake the seeds into the soil and water thoroughly.
Step 5: Water and Fertilize
Keep the seeded or sodded area consistently moist but not soggy. Water lightly and frequently, especially during dry periods. After the grass has established itself, you can begin to fertilize it regularly with a balanced lawn fertilizer. Be careful not to over-fertilize, as this can also cause problems.
Preventing Future Problems: Maintaining a Healthy Lawn
The best way to fix brown spots in your yard is to prevent them from happening in the first place. Here are some tips for maintaining a healthy lawn:
- Water Properly: Water deeply and infrequently, rather than shallowly and frequently. This encourages deep root growth, which makes the grass more drought-tolerant. The best time to water is early in the morning, so the grass has time to dry before nightfall.
- Mow Correctly: Mow at the correct height for your grass type. Never remove more than one-third of the grass blade at a time. Keep your mower blades sharp.
- Fertilize Regularly: Use a balanced lawn fertilizer to provide your grass with the nutrients it needs to thrive. Follow the instructions on the fertilizer label carefully. Consider performing a soil test to determine the specific nutrient needs of your lawn.
- Aerate Regularly: Aerate your lawn at least once a year to alleviate soil compaction.
- Control Pests and Diseases: Monitor your lawn regularly for signs of pests and diseases. Take action promptly to prevent infestations from becoming severe.
By following these tips, you can keep your lawn healthy and vibrant, minimizing the risk of brown spots. Remember, a little preventative maintenance can go a long way in ensuring a lush, green lawn that you can enjoy for years to come. Fixing brown spots in yard might seem tedious but, with the right knowledge and tools, it becomes a rewarding endeavor.