Ever tripped over a wave in your carpet? That pesky buckling can be more than just an eyesore; it's a safety hazard waiting to happen. But don't worry, you don't necessarily need to call in a professional. Fixing buckled carpet is often a DIY project you can tackle yourself with a little patience and the right tools. Let's explore how to get your carpet smooth and flat again! Why is My Carpet Buckling? Understanding the Root Causes Before you dive into fixing the problem, it's helpful to understand why your carpet is buckling in the first place. Identifying the cause will not only help you choose the right solution but also prevent the problem from recurring. Common Culprits Behind Carpet Buckling: Improper Installation: This is the most frequent offender. If the carpet wasn't stretched correctly during installation, it's prone to loosening and buckling over time. Humidity: Excessive moisture can cause the carpet fibers and...
Imagine you're cruising down the road, enjoying your favorite tunes, when suddenly you notice it: your odometer is blinking like a disco ball. It's distracting, annoying, and more than a little concerning. What's causing this electronic hiccup, and more importantly, how can you fix it? Let's dive into the mysterious world of the blinking odometer and get your dashboard back to normal.
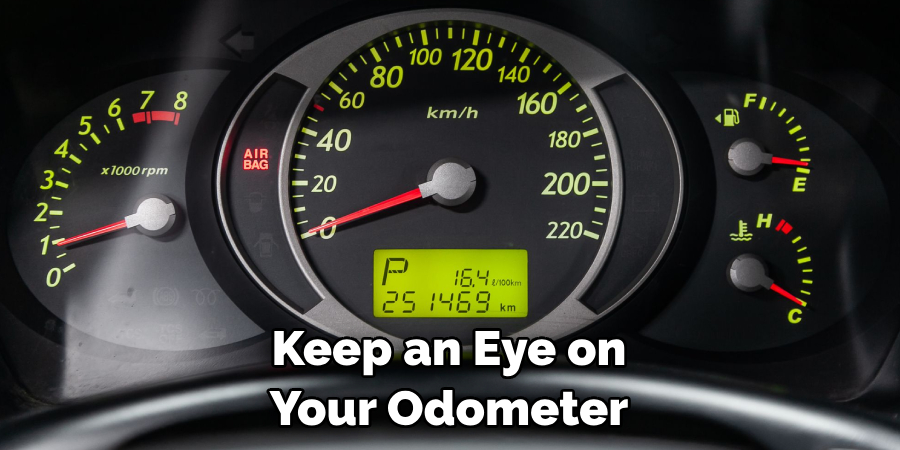
Understanding the Blinking Odometer Issue
The dreaded blinking odometer is most commonly associated with Fiat Chrysler Automobiles (FCA) vehicles, including Fiat, Chrysler, Dodge, Jeep, and Ram models. This digital dance usually indicates a problem with theProxi Alignment(Proxy Configuration Alignment), also known asCAN (Controller Area Network) bus communication. Think of your car's electronic systems as a sophisticated network, constantly exchanging information. The odometer, along with other components like the radio, climate control, and even the engine control unit (ECU), all communicate with each other. The Proxi Alignment is essentially the software that ensures all these components are on the same page, using the same language, and know they belong together in your car.
When the Proxi Alignment is disrupted, the various electronic control modules (ECMs) in your car might not recognize each other. This disconnect often manifests as a blinking odometer, signaling that something is out of sync. This issue isn’t just an annoyance; it can sometimes lead to other problems, such as warning lights, malfunctioning features (like the radio or climate control), and even diagnostic trouble codes (DTCs) stored in the vehicle's computer.
Common Causes of Odometer Blinking
Several factors can trigger a blinking odometer. Understanding the potential causes is the first step in diagnosing and fixing the problem.
- Module Replacement or Upgrade: This is perhaps the most frequent cause. When you replace or upgrade an electronic module, such as the radio, body control module (BCM), or instrument cluster, the new module may not be properly aligned with the rest of the vehicle's system. This lack of synchronization will cause the blinking odometer.
- Software Updates: Sometimes, a software update to one of the vehicle's modules can inadvertently disrupt the Proxi Alignment. This is relatively rare but can occur, particularly if the update process is interrupted or incomplete.
- Battery Issues: A weak or dying battery can sometimes cause electronic glitches, including a blinking odometer. The low voltage can scramble the communication between modules, leading to misalignment.
- Wiring Problems: Faulty wiring, loose connections, or damaged harnesses can also interfere with the CAN bus communication, resulting in a blinking odometer.
- Aftermarket Modifications: Installing aftermarket electronic devices, especially those that tap into the vehicle's wiring, can sometimes disrupt the CAN bus and cause Proxi Alignment issues. Examples include non-OEM remote starters, sound systems, or lighting modifications.
- Faulty Module: In rare cases, a malfunctioning electronic module itself can cause the blinking odometer. This is usually accompanied by other symptoms related to the faulty module.
How to Fix a Blinking Odometer: Step-by-Step Guide
Now for the big question: How do you actually fix a blinking odometer? Unfortunately, this usually isn’t a DIY project for the average car owner, as it often requires specialized diagnostic tools and software. However, here's a breakdown of the steps involved and what you can expect:
1. Diagnostic Scan
The first step is to perform a comprehensive diagnostic scan of your vehicle's electronic systems. This requires a scan tool capable of reading and interpreting DTCs from all the modules in your car. While a basic OBD-II scanner might show some generic codes, you'll need a more advanced scanner that supports CAN bus diagnostics and Proxi Alignment to pinpoint the exact cause of the blinking odometer.
This scan will identify any stored DTCs related to CAN bus communication, module misconfiguration, or other relevant issues. It will also provide valuable information about which modules are not properly communicating with the rest of the system.
2. Proxi Alignment Procedure
The core of fixing a blinking odometer is performing a Proxi Alignment procedure. This involves using a specialized diagnostic tool, such as the Wi Tech (Chrysler's official diagnostic tool), Alfa OBD (a popular third-party option), or similar software, to rewrite the configuration data across all the vehicle's modules. This ensures that all modules are communicating correctly and are aware of each other's presence.
The Proxi Alignment procedure typically involves the following steps:
- Connect the diagnostic tool to the vehicle's OBD-II port.
- Select the correct vehicle year, make, and model in the diagnostic software.
- Navigate to the Proxi Alignment or Configuration section of the software.
- Follow the on-screen instructions to initiate and complete the alignment procedure. This may involve selecting specific options or entering certain codes.
- The software will then communicate with each module, updating its configuration data to match the rest of the system.
- Once the procedure is complete, the software will typically display a confirmation message.
Important Note: The Proxi Alignment procedure can be complex and requires a thorough understanding of your vehicle's electronic systems. Incorrectly performing the procedure can potentially cause further problems or even damage to your vehicle's modules. If you're not comfortable with this process, it's best to leave it to a qualified mechanic or technician.
3. Clearing Diagnostic Trouble Codes (DTCs)
After performing the Proxi Alignment, it's essential to clear any stored DTCs from the vehicle's computer. These codes may persist even after the alignment is successful and can sometimes trigger warning lights or other issues. The diagnostic tool will typically have a function for clearing DTCs. Simply select this function and follow the on-screen instructions to erase the codes.
4. Addressing Other Potential Issues
In some cases, the blinking odometer may be caused by underlying issues that need to be addressed separately. For example:
- Low Battery Voltage: If a weak battery is suspected, have it tested and replaced if necessary. Make sure the replacement battery is properly registered with the vehicle's system. Some vehicles require battery registration after a replacement to ensure proper charging and performance.
- Wiring Problems: If wiring issues are suspected, carefully inspect the wiring harnesses and connectors related to the CAN bus for any signs of damage, corrosion, or loose connections. Repair or replace any faulty wiring as needed.
- Faulty Module: If a specific module is identified as faulty, it may need to be replaced. After replacing the module, you'll need to perform a Proxi Alignment to integrate it into the vehicle's system.
5. Verification and Testing
After completing the Proxi Alignment and addressing any other potential issues, it's crucial to verify that the blinking odometer has been resolved. Start the vehicle and observe the odometer. If the blinking has stopped and all other features are functioning correctly, the repair was successful. If the blinking persists, you may need to revisit the diagnostic steps and investigate further.
Case Study: A local repair shop encountered a Jeep Grand Cherokee with a blinking odometer after the radio was replaced. Using the Wi Tech diagnostic tool, they identified a Proxi Alignment mismatch between the new radio and the rest of the vehicle's system. They performed the Proxi Alignment procedure, cleared the DTCs, and the blinking odometer was resolved. The customer also noted that the radio's sound quality improved after the alignment, indicating that the communication between the radio and the amplifier was also optimized.
Preventing Future Blinking Odometer Issues
While you can't always prevent electronic glitches, there are some steps you can take to minimize the risk of future blinking odometer issues:
- Use Qualified Technicians: When replacing or upgrading electronic modules, always use a qualified technician who is familiar with your vehicle's systems and has the necessary diagnostic tools to perform a Proxi Alignment.
- Stick to OEM Parts: When possible, use OEM (Original Equipment Manufacturer) parts when replacing electronic modules. OEM parts are designed to work seamlessly with your vehicle's system and are less likely to cause compatibility issues.
- Be Careful with Aftermarket Modifications: Exercise caution when installing aftermarket electronic devices, especially those that tap into the vehicle's wiring. Choose reputable brands and have the installation performed by a qualified technician.
- Maintain Your Battery: Keep your battery in good condition by regularly checking its voltage and replacing it when necessary. A weak battery can cause a variety of electronic problems, including a blinking odometer.
- Regular Maintenance: Adhere to your vehicle's recommended maintenance schedule, including software updates. These updates often include bug fixes and improvements that can help prevent electronic glitches.
When to Seek Professional Help to Fix Odometer Blinking
While some of the troubleshooting steps for a blinking odometer might seem straightforward, it's often best to seek professional help. This is especially true if:
- You don't have access to a suitable diagnostic scan tool.
- You're not comfortable working with your vehicle's electronic systems.
- The blinking odometer persists after attempting basic troubleshooting steps.
- You suspect a faulty module or wiring problem.
A qualified mechanic or technician will have the necessary expertise, tools, and software to accurately diagnose and fix the problem. They can also ensure that the repair is performed correctly and that your vehicle's electronic systems are functioning optimally. Looking for "auto electrical repair near me" can help in finding a reliable technician.
Alternative Solutions: Addressing Odometer Issues
While the Proxi Alignment is often the primary solution for a blinking odometer, exploring alternative solutions can be beneficial, especially when dealing with persistent or complex issues.
Software Updates and Recalibration
Many modern vehicles rely heavily on software to manage various functions. Outdated or corrupted software can sometimes cause communication errors between modules, leading to a blinking odometer. Ensure that your vehicle's software is up-to-date. Dealerships often offer software updates as part of routine maintenance. Additionally, recalibrating certain modules, such as the instrument cluster, may resolve odometer-related problems.
Reviewing Vehicle History and Documentation
Thoroughly review your vehicle's history and any relevant documentation, especially if the blinking odometer appeared after a specific event or service. This can provide clues about potential causes and solutions. For example, if the odometer started blinking after a radio replacement, it reinforces the likelihood of a Proxi Alignment issue.
Checking Wiring and Connections
Damaged or corroded wiring and loose connections can disrupt communication between electronic modules. Inspect wiring harnesses and connectors related to the instrument cluster and other relevant components. Look for signs of damage, corrosion, or loose connections. Clean corroded terminals and securely reattach any loose connections. In some cases, wiring repairs or replacements may be necessary.
Conclusion: Tackling the Blinking Odometer
A blinking odometer can be a frustrating and confusing issue, but understanding the underlying causes and following the appropriate troubleshooting steps can help you get your dashboard back to normal. Remember that the Proxi Alignment is often the key to resolving this problem, but it's essential to address any underlying issues, such as a weak battery or faulty wiring. If you're not comfortable with the diagnostic and repair process, don't hesitate to seek professional help from a qualified mechanic or technician. With the right approach, you can stop the blinking and enjoy a smooth, worry-free ride.