Ever tripped over a wave in your carpet? That pesky buckling can be more than just an eyesore; it's a safety hazard waiting to happen. But don't worry, you don't necessarily need to call in a professional. Fixing buckled carpet is often a DIY project you can tackle yourself with a little patience and the right tools. Let's explore how to get your carpet smooth and flat again! Why is My Carpet Buckling? Understanding the Root Causes Before you dive into fixing the problem, it's helpful to understand why your carpet is buckling in the first place. Identifying the cause will not only help you choose the right solution but also prevent the problem from recurring. Common Culprits Behind Carpet Buckling: Improper Installation: This is the most frequent offender. If the carpet wasn't stretched correctly during installation, it's prone to loosening and buckling over time. Humidity: Excessive moisture can cause the carpet fibers and...
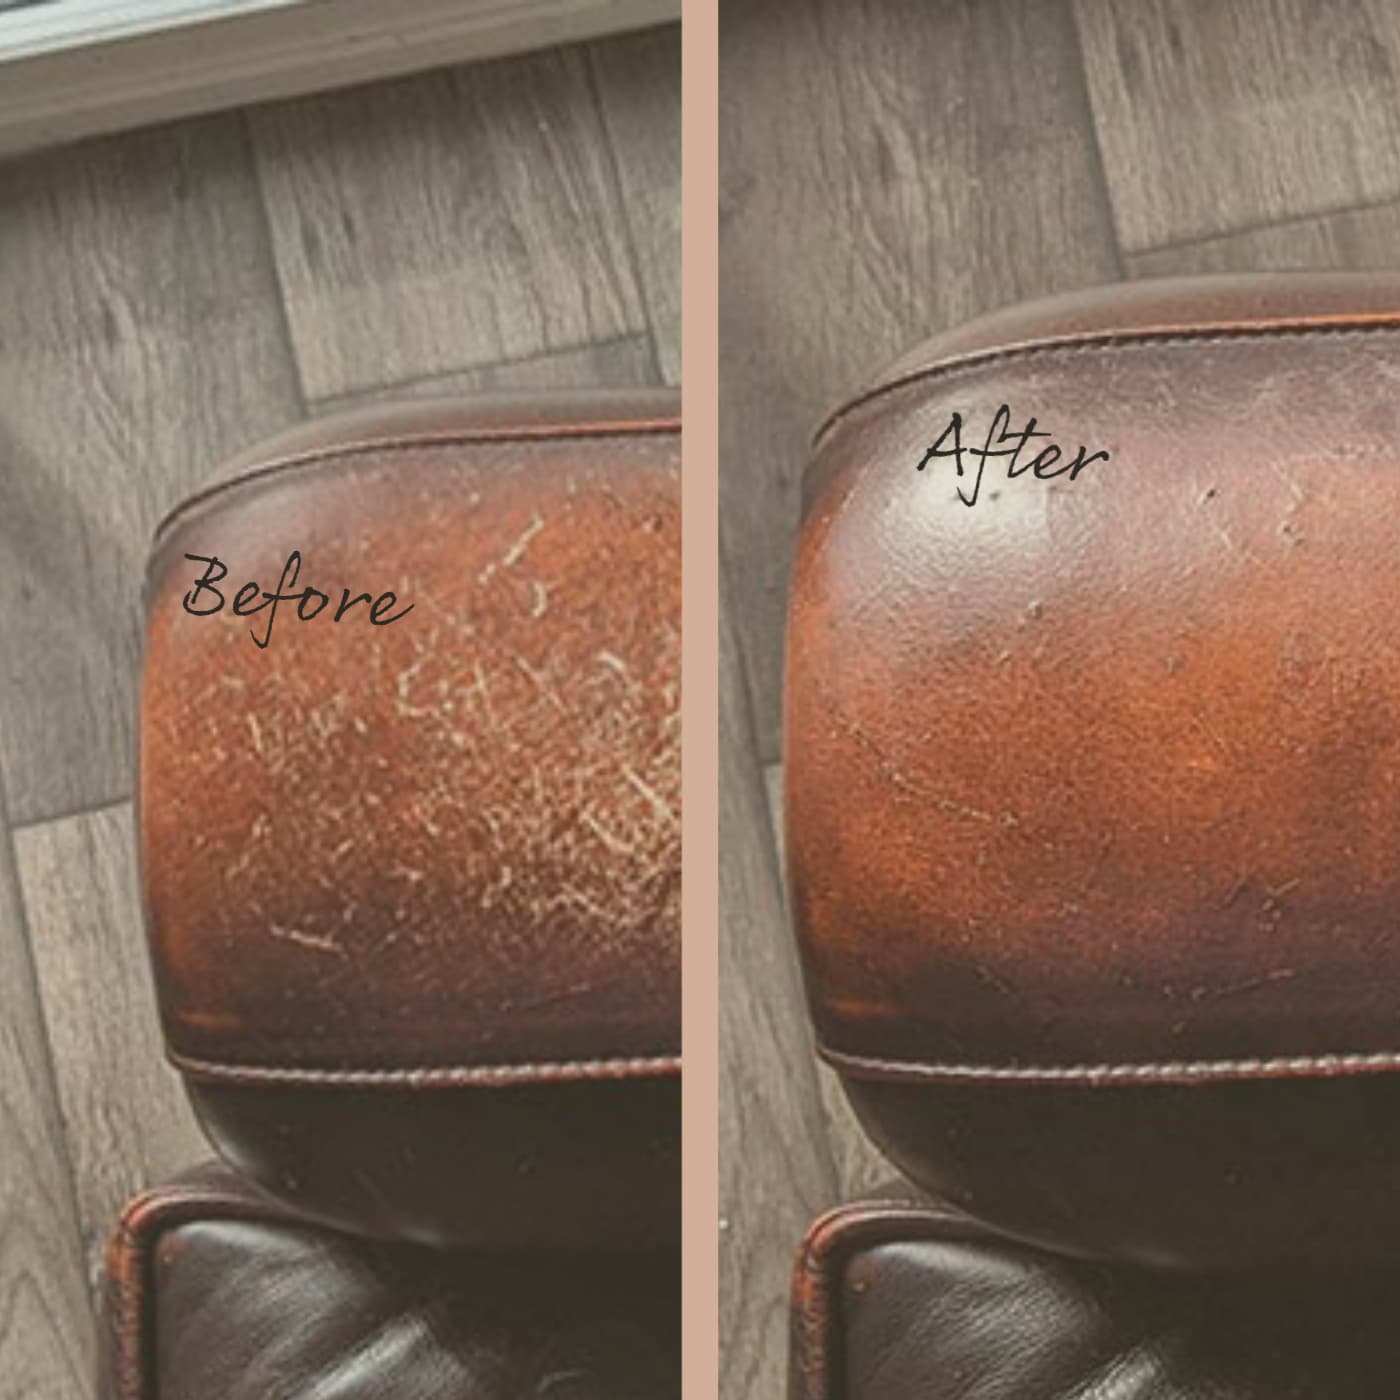
Oh, no! Did your favorite leather jacket, handbag, or sofa suffer a battle wound? Scratches on leather are a bummer, but don't despair! Before you resign yourself to a life of hiding the imperfections, let's explore some simple and effective ways you can tackle those scratches and restore your leather goods to their former glory. This guide will walk you through the process of how to fix scratches on leather like a pro.
Understanding Leather Scratches and Leather Types
Before diving into fixing scratches on leather, it's important to understand what kind of scratch you're dealing with and the type of leather you're working with. Not all leathers are created equal, and different types require different approaches. Identifying the scratch will help determine the best method forleather scratch repair.
Types of Leather Scratches
Leather scratches typically fall into a few categories:
- Superficial Scratches: These are light surface marks that don't penetrate the leather's finish or dye. They often appear as slight abrasions.
- Moderate Scratches: These scratches are a bit deeper, affecting the color and texture of the leather. You might see a noticeable color difference where the scratch occurred.
- Deep Scratches: These are the most severe, penetrating the leather's surface significantly. They might even expose the raw leather underneath.
Knowing the depth of the scratch is crucial in choosing the right repair technique. For example, a superficial scratch might only need conditioning, while a deep scratch could require filling and re-dyeing.
Types of Leather
Identifying the type of leather is equally important. Here are some common types:
- Aniline Leather: This is the most natural-looking leather, with a visible grain and minimal surface coating. It's also the most delicate and prone to scratching.
- Semi-Aniline Leather: This leather has a light protective coating, making it more resistant to scratches and stains than aniline leather but still retaining a natural look.
- Protected/Finished Leather: This leather has a durable, pigmented coating that provides significant protection against scratches and stains. It's the most common type and the easiest to clean and maintain.
- Nubuck Leather: Nubuck is top-grain leather that has been sanded or buffed on the grain side to give it a velvet-like feel. It's more prone to scratches than finished leather.
- Suede Leather: Suede is made from the underside of the animal hide and has a napped finish. It is also more prone to scratches than finished leather.
Check the manufacturer's label or website for your item to determine the leather type. If you're unsure, test any cleaning or repair method in an inconspicuous area first.
How to Fix Light Scratches on Leather: Simple Solutions
For superficial scratches, often all you need are a few simple tricks. These methods aim to blend the scratch into the surrounding leather and restore its natural appearance. This is the easiest way to*repair leather scratches.
Leather Conditioner
A good leather conditioner can often work wonders on light scratches. Leather conditioners contain oils and waxes that moisturize the leather, making it more pliable and helping to blend the scratch. This is a great first step infixing leather scratches.
- Clean the area around the scratch with a soft, damp cloth to remove any dirt or debris.
- Apply a small amount of leather conditioner to a clean cloth.
- Gently massage the conditioner into the scratched area, using circular motions.
- Allow the conditioner to soak into the leather for several minutes.
- Wipe away any excess conditioner with a clean cloth.
- Repeat the process if necessary.
Always choose a conditioner specifically designed for your type of leather. Test the conditioner in an inconspicuous area first to ensure it doesn't discolor the leather.
Leather Oil
Similar to conditioner, leather oil can help to moisturize the leather and minimize the appearance of light scratches. Neatsfoot oil and mink oil are popular choices.
- Clean the area around the scratch with a soft, damp cloth.
- Apply a small amount of leather oil to a clean cloth.
- Gently rub the oil into the scratch and surrounding area.
- Allow the oil to absorb for several hours or overnight.
- Wipe away any excess oil with a clean cloth.
Be careful not to over-oil the leather, as this can make it greasy and attract dirt. Use sparingly and wipe off any excess thoroughly.
Your Fingers
Believe it or not, the warmth and natural oils from your fingers can sometimes be enough to blend away light scratches. Simply rub the scratch with your fingertip in a circular motion for a few minutes. The friction and oils can help to smooth the leather and minimize the appearance of the scratch.
This method works best on aniline and semi-aniline leathers. The oils from your skin help to re-distribute the oils in the leather, reducing the scratch visibility.
How to Fix Moderate Scratches on Leather:A More Involved Approach
For scratches that are a bit deeper and more noticeable, you'll need a more involved approach. These methods aim to fill in the scratch and restore the color to the affected area. These are also great steps for*leather scratch repair.
Leather Repair Kits
Leather repair kits are readily available online and in leather goods stores. These kits typically include fillers, colorants, and applicators to help you repair scratches and other imperfections. This is often the best way tofix scratches on leather, but make sure to follow the instructions carefully.
Here's a general overview of how to use a leather repair kit:
- Clean the scratched area thoroughly.
- Apply the leather filler to the scratch, using a small spatula or applicator.
- Smooth the filler evenly and allow it to dry completely.
- Sand the filled area lightly with fine-grit sandpaper to create a smooth surface.
- Match the color of the surrounding leather using the colorants provided in the kit.
- Apply the colorant to the filled area, using a sponge or brush.
- Allow the colorant to dry completely.
- Apply a leather finish or sealant to protect the repaired area.
Always follow the specific instructions provided with your leather repair kit. Practice on a hidden area first to get a feel for the process and ensure a color match.
Leather Dye
If the scratch has removed the color from the leather, you'll need to re-dye the affected area. This requires matching the color of the existing leather and applying the dye carefully.
- Clean the scratched area thoroughly.
- Apply a leather deglazer to remove any existing finish.
- Carefully apply the leather dye to the scratched area, using a small brush or sponge.
- Blend the dye into the surrounding leather to create a seamless transition.
- Allow the dye to dry completely.
- Apply a leather finish or sealant to protect the dyed area.
Matching the color can be tricky. Consider taking your leather item to a professional leather repair shop for color matching. You can also mix dye colors yourself to achieve the desired shade. Remember to always test the dye in an inconspicuous area first.
Leather Balm
For some moderate scratches, a good quality leather balm can often fill the scratch and restore some of the color. Leather balms are available in various shades. Choose one that closely matches the color of your leather.
- Clean the scratched area thoroughly.
- Apply a small amount of leather balm to a clean cloth.
- Rub the balm into the scratch and surrounding area in circular motions.
- Allow the balm to sit for a few minutes.
- Wipe off any excess balm with a clean cloth.
How to Fix Deep Scratches on Leather: When Professional Help is Needed
Deep scratches require specialized techniques and materials. If you're dealing with a deep scratch that exposes the raw leather underneath, it's often best to consult a professional leather repair technician. A professional can assess the damage and determine the best course of action, which may involve filling the scratch, re-dyeing the leather, and applying a protective finish.
Why Choose a Professional?
- Expertise: Professionals have the knowledge and experience to repair leather correctly.
- Tools and Materials: They have access to specialized tools and high-quality materials that are not readily available to the general public.
- Color Matching: Professionals are skilled at matching colors and creating seamless repairs.
- Guaranteed Results: Many professionals offer a guarantee on their work.
While it may be tempting to try and repair a deep scratch yourself, you risk causing further damage to the leather. A professional can ensure a long-lasting and aesthetically pleasing repair. Consider this step when you're looking athow to fix leather scratches.
Preventing Future Scratches
Prevention is always better than cure! Here are some tips to help prevent scratches on your leather items:
- Regular Conditioning: Keep your leather moisturized to prevent it from drying out and becoming more susceptible to scratches.
- Avoid Sharp Objects: Be mindful of sharp objects that could come into contact with your leather items.
- Storage: Store leather items properly, away from direct sunlight and heat. Use dust bags to protect them from dust and scratches.
- Professional Cleaning: Consider professional cleaning and conditioning for valuable leather items on a regular basis.
By taking good care of your leather items, you can minimize the risk of scratches and keep them looking their best for years to come.