Ever tripped over a wave in your carpet? That pesky buckling can be more than just an eyesore; it's a safety hazard waiting to happen. But don't worry, you don't necessarily need to call in a professional. Fixing buckled carpet is often a DIY project you can tackle yourself with a little patience and the right tools. Let's explore how to get your carpet smooth and flat again! Why is My Carpet Buckling? Understanding the Root Causes Before you dive into fixing the problem, it's helpful to understand why your carpet is buckling in the first place. Identifying the cause will not only help you choose the right solution but also prevent the problem from recurring. Common Culprits Behind Carpet Buckling: Improper Installation: This is the most frequent offender. If the carpet wasn't stretched correctly during installation, it's prone to loosening and buckling over time. Humidity: Excessive moisture can cause the carpet fibers and...
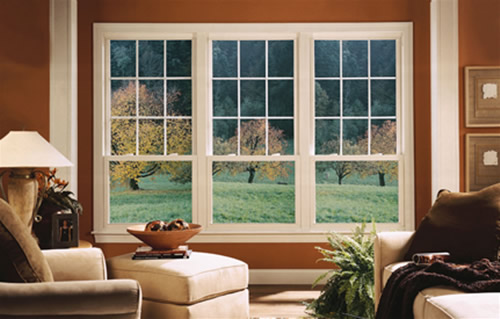
Is there anything more unsettling than feeling a cold gust of air while you're sitting comfortably inside your home? Drafty windows are a common problem, but thankfully, they're often easy to fix. Say goodbye to that chilly discomfort and hello to a warmer, more energy-efficient home! Let's explore how to tackle those pesky drafts and enjoy a cozy living space.
Understanding the Problem: Why are Your Windows Drafty?
Before diving into fixes, it's essential to understand why you're experiencing a draft. Several factors can contribute to a drafty window, and identifying the root cause will help you choose the most effective solution. The most common reasons include:
- Gaps in Caulking: Over time, the caulk around your windows can crack, shrink, or peel away, creating openings for air to leak through.
- Worn Weatherstripping: Weatherstripping, the material that seals the space between the window sash and frame, can become brittle and ineffective with age.
- Loose or Damaged Window Panes: If the glass panes aren't properly sealed in the window frame, air can seep through.
- Improper Window Installation: In some cases, the windows may not have been installed correctly in the first place, leaving gaps and voids.
- Frame Issues: The window frame itself can warp, crack, or rot, creating pathways for air to escape.
How to Identify Drafty Windows
Pinpointing the exact location of the draft is crucial for effective repairs. Here are some simple methods you can use:
- The Hand Test: On a cold or windy day, slowly move your hand around the edges of the window frame. Pay close attention to where you feel a distinct temperature change.
- The Candle or Incense Test: Light a candle or incense stick and hold it near the window frame. If the flame flickers or the smoke wavers, it indicates a draft. Be extremely careful when using open flames near your windows.
- The Paper Test: Close the window on a strip of paper. If you can easily pull the paper out when the window is closed, the seal is not tight. Test this at various points around the window.
Fixing Drafty Windows: A Step-by-Step Guide
Now that you've identified the source of the draft, it's time to take action. Here are some effective methods for fixing drafty windows, starting with the easiest and most affordable options:
1. Replacing Caulk to Fix a Draft in Window
Cracked or missing caulk is one of the most common causes of drafts. Replacing it is a relatively simple DIY project. Here's how:
- Gather Your Supplies: You'll need a caulk gun, a utility knife or caulk removal tool, new caulk (choose a paintable acrylic latex caulk for general use or a silicone caulk for areas exposed to moisture), and a damp sponge.
- Remove the Old Caulk: Use the utility knife or caulk removal tool to carefully cut along the edges of the old caulk. Pry it away from the window frame and the surrounding wall.
- Clean the Surface: Thoroughly clean the area with a damp sponge to remove any remaining debris, dirt, or mildew. Make sure the surface is completely dry before applying new caulk.
- Apply the New Caulk: Load the caulk tube into the caulk gun. Cut the tip of the tube at a 45-degree angle. Apply a smooth, consistent bead of caulk along the joint between the window frame and the wall.
- Smooth the Caulk: Immediately after applying the caulk, use your finger or a caulk smoothing tool to create a smooth, even finish. Wipe away any excess caulk with a damp sponge.
- Allow to Dry: Let the caulk dry completely according to the manufacturer's instructions before painting or exposing it to moisture.
Tip: For a cleaner caulk line, apply painter's tape along both sides of the joint before caulking. Remove the tape immediately after smoothing the caulk.
2. Replacing Weatherstripping to Stop a Draft in Windows
Worn or damaged weatherstripping is another frequent culprit of drafts. Fortunately, replacing it is usually a straightforward task.
- Identify the Type of Weatherstripping: There are various types of weatherstripping, including foam tape, felt, V-strip, and metal. Determine which type is used on your windows before purchasing a replacement.
- Remove the Old Weatherstripping: Depending on the type, you may be able to simply peel off the old weatherstripping. For some types, you may need to use a screwdriver or pliers to remove staples or nails.
- Clean the Surface: Clean the area where the weatherstripping will be applied to remove any dirt, debris, or adhesive residue.
- Install the New Weatherstripping: Cut the weatherstripping to the correct length and apply it to the window frame or sash according to the manufacturer's instructions. For adhesive-backed weatherstripping, peel off the backing and press it firmly into place. For other types, you may need to use staples, nails, or screws.
Choosing the right weatherstripping:
- Foam Tape: Inexpensive and easy to install, but less durable than other options. Suitable for small gaps.
- Felt: Affordable but not very effective at sealing out drafts. Best for windows with minimal gaps.
- V-Strip (Tension Seal): Durable and effective at sealing larger gaps. Requires some skill to install properly.
- Metal Weatherstripping: The most durable option, but also the most expensive and difficult to install. Offers excellent protection against drafts and can last for many years.
3. Applying Window Film to Fix Window Drafts
Window film is a thin, transparent plastic sheet that you apply to the inside of your window glass. It creates an extra layer of insulation, reducing heat loss and drafts. Window film is a cost-effective and easy-to-install solution for improving energy efficiency.
- Clean the Window: Thoroughly clean the window glass with a window cleaner and a lint-free cloth. Make sure the surface is completely dry.
- Measure and Cut the Film: Measure the window pane and cut the window film slightly larger than the measured size.
- Apply the Film: Spray the window glass with water. Peel off the backing from the window film and carefully apply it to the wet glass.
- Smooth Out Air Bubbles: Use a squeegee or a credit card to smooth out any air bubbles or wrinkles in the film. Start from the center and work your way to the edges.
- Trim the Excess: Use a sharp utility knife to trim the excess film around the edges of the window pane.
- Heat Shrink the Film (if applicable): Some window films require heat shrinking to create a tight seal. Use a hairdryer to gently heat the film, smoothing out any remaining wrinkles or bubbles as you go.
4. Repairing Loose or Damaged Window Panes
If you notice that the glass panes in your windows are loose or damaged, it's essential to address the issue promptly to prevent drafts and further damage.
- Inspect the Glazing: Carefully examine the glazing (the putty or compound that holds the glass in place) around the window panes. Look for cracks, chips, or missing pieces.
- Remove the Old Glazing: Use a putty knife or a heat gun to soften and remove the old glazing. Be careful not to damage the glass or the window frame.
- Clean the Surface: Clean the area where the new glazing will be applied to remove any dirt, debris, or old glazing residue.
- Apply the New Glazing: Apply a bead of new glazing compound around the edge of the window pane.
- Secure the Glass: Gently press the glass pane into the glazing, ensuring that it is firmly seated in the frame.
- Smooth the Glazing: Use a putty knife to smooth the glazing compound and create a neat, uniform finish.
- Allow to Dry: Let the glazing dry completely according to the manufacturer's instructions before painting or exposing it to moisture.
5. Professional Help For Fixing a Window Draft
In some cases, the cause of the draft may be more complex and require professional assistance. If you've tried the above methods and are still experiencing drafts, or if you suspect that the problem is related to improper window installation or structural issues, it's best to consult with a qualified window repair specialist.
When to Call a Professional:
- Extensive Damage: If the window frame is severely damaged or rotted, it may need to be repaired or replaced by a professional.
- Improper Installation: If you suspect that the windows were not installed correctly in the first place, a professional can assess the situation and recommend the appropriate solution.
- Complex Repairs: Some window repairs, such as replacing broken glass or repairing damaged sashes, require specialized tools and expertise.
- Multiple Windows: If you have multiple drafty windows, it may be more efficient and cost-effective to hire a professional to address them all at once.
Preventative Measures to Avoid Drafty Windows
Preventing drafts is always better than having to fix them later. Here are some proactive steps you can take to keep your windows draft-free:
- Regular Inspections: Inspect your windows regularly for signs of damage, such as cracks, gaps, or worn weatherstripping. Address any issues promptly to prevent them from worsening.
- Proper Maintenance: Keep your windows clean and free of debris. Lubricate moving parts, such as hinges and locks, to ensure smooth operation.
- High-Quality Materials: When replacing windows, invest in high-quality, energy-efficient models. Choose windows with low-E glass and airtight seals.
- Professional Installation: Ensure that your windows are installed correctly by a qualified professional. Proper installation is crucial for preventing drafts and ensuring optimal performance.
Conclusion
Fixing drafty windows is an investment in your comfort, energy efficiency, and overall home value. By understanding the causes of drafts and implementing the appropriate solutions, you can create a warmer, more comfortable living space and save money on your energy bills. Whether you tackle the repairs yourself or enlist the help of a professional, taking action to address those pesky drafts will make a significant difference in your home's comfort and efficiency. With these tips you can fix a draft in a window quickly and easily.