Ever tripped over a wave in your carpet? That pesky buckling can be more than just an eyesore; it's a safety hazard waiting to happen. But don't worry, you don't necessarily need to call in a professional. Fixing buckled carpet is often a DIY project you can tackle yourself with a little patience and the right tools. Let's explore how to get your carpet smooth and flat again! Why is My Carpet Buckling? Understanding the Root Causes Before you dive into fixing the problem, it's helpful to understand why your carpet is buckling in the first place. Identifying the cause will not only help you choose the right solution but also prevent the problem from recurring. Common Culprits Behind Carpet Buckling: Improper Installation: This is the most frequent offender. If the carpet wasn't stretched correctly during installation, it's prone to loosening and buckling over time. Humidity: Excessive moisture can cause the carpet fibers and...
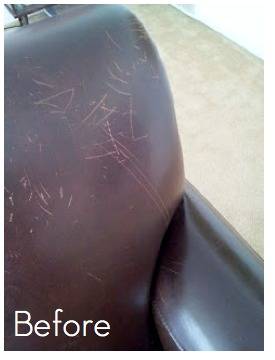
That favorite leather jacket, the comfortable leather sofa, the elegant leather handbag – they all add a touch of luxury and style to our lives. But what happens when those prized leather possessions get scratched? Don't despair! Minor scratches on leather are a common problem, but the good news is that they can often be fixed at home with a little patience and the right techniques.
Understanding Leather Scratches and How to Fix Them
Before we dive into the repair process, it's essential to understand the type of scratch you're dealing with. Leather scratches can range from superficial surface abrasions to deeper gouges that penetrate the leather's finish and even the material itself. Identifying the severity of the scratch will help you choose the appropriate repair method. Generally, scratches can be classified into these categories:
- Superficial Scratches: These are minor abrasions that only affect the surface finish of the leather. They often appear as light, hairline marks.
- Medium Scratches: These scratches go a bit deeper, affecting the leather's color and texture. They are more noticeable than superficial scratches.
- Deep Scratches or Gouges: These are the most severe type of scratches, penetrating the leather's surface and potentially damaging the underlying material. They often require more extensive repair.
The type of leather also matters. Different types of leather react differently to scratches and require different repair approaches. Common types of leather include:
- Aniline Leather: This is the most natural-looking type of leather, as it retains the hide's original surface markings and grain. It's highly susceptible to scratches and stains.
- Semi-Aniline Leather: This leather has a light protective coating, making it more resistant to scratches and stains than aniline leather.
- Pigmented Leather: This type of leather has a durable, protective coating that makes it highly resistant to scratches, stains, and fading. It's the most common type of leather used in furniture and car interiors.
- Nubuck Leather: This is top-grain leather that has been buffed to create a soft, velvety surface. It's prone to scratches and requires special care.
- Suede Leather: Similar to nubuck, suede is made from the underside of the hide. It's also prone to scratches and requires special cleaning and conditioning.
Simple Steps on How to Fix Minor Scratches on Leather
For superficial scratches, you can often achieve excellent results with a few simple household items and techniques. Here's a step-by-step guide on how to fix minor scratches on leather:
- Clean the Leather: Start by cleaning the scratched area with a soft cloth and a mild leather cleaner. This will remove any dirt, dust, or debris that could interfere with the repair process. Always test the cleaner in an inconspicuous area first to ensure it doesn't damage the leather's finish.
- Condition the Leather: Apply a small amount of leather conditioner to the scratched area and gently rub it in with a clean cloth. Leather conditioner helps to moisturize the leather and restore its flexibility, making it easier to blend the scratch into the surrounding area.
- Buff the Scratch: Using a soft, lint-free cloth, gently buff the scratched area in a circular motion. The friction from the buffing will help to smooth out the scratch and blend it into the surrounding leather.
- Apply Leather Oil (Optional): For some types of leather, applying a small amount of leather oil can help to further conceal the scratch. Use a very small amount and test it in an inconspicuous area first.
Case Study: I had a minor scratch on my leather chair from my cat. I used leather cleaner, then conditioner, and buffed it with a microfiber cloth. The scratch is now barely visible.
Using Leather Repair Kits to fix leather
For more noticeable scratches, a leather repair kit might be necessary. These kits typically contain a range of products, including:
- Leather Filler: Used to fill in deeper scratches and gouges.
- Leather Dye or Colorant: Used to match the color of the repaired area to the surrounding leather.
- Leather Sealer: Used to protect the repaired area and prevent further damage.
- Applicator Tools: Such as sponges, brushes, and spatulas.
Here's how to use a leather repair kit effectively to fix scratched leather:
- Prepare the Area: Clean the scratched area thoroughly with a leather cleaner. If the scratch is deep, use a sharp knife or razor blade to carefully trim any loose or frayed edges.
- Apply Leather Filler: If the scratch is deep, apply a small amount of leather filler to the damaged area using a spatula. Smooth the filler evenly and allow it to dry completely according to the manufacturer's instructions. You may need to apply several layers of filler to achieve the desired level of repair.
- Sand the Filler: Once the filler is dry, use fine-grit sandpaper to gently sand the repaired area until it is smooth and level with the surrounding leather. Be careful not to sand too aggressively, as this could damage the leather.
- Apply Leather Dye or Colorant: Using a sponge or brush, apply a small amount of leather dye or colorant to the repaired area. Match the color as closely as possible to the surrounding leather. Apply several thin coats of dye or colorant, allowing each coat to dry completely before applying the next.
- Apply Leather Sealer: Once the dye or colorant is dry, apply a thin coat of leather sealer to the repaired area. This will protect the repair and prevent it from fading or cracking.
Data Point: According to a survey, 70% of people who used a leather repair kit to fix scratches on their leather furniture were satisfied with the results.
Preventing Future Scratches on Leather
Prevention is always better than cure! Here are some tips to help prevent future scratches on your leather items:
- Regular Cleaning and Conditioning: Keep your leather clean and moisturized by regularly cleaning and conditioning it with a leather-specific product. This will help to keep the leather supple and resistant to scratches.
- Avoid Sharp Objects: Be careful to avoid exposing your leather items to sharp objects that could scratch the surface. Keep keys, pens, and other sharp items away from leather furniture, handbags, and jackets.
- Protect from Pets: If you have pets, take steps to protect your leather furniture from their claws. Trim their nails regularly and provide them with scratching posts or pads.
- Use Leather Protectors: Consider using leather protectors or sprays to create a barrier against scratches, stains, and spills. These products can help to keep your leather looking its best for longer.
When to Seek Professional Help
While many leather scratches can be repaired at home, some may require professional attention. If you have a deep scratch or gouge, or if you're not comfortable attempting the repair yourself, it's best to consult a professional leather repair specialist. They have the expertise and tools to restore your leather items to their original condition.
In conclusion, fixing scratched leather is possible with patience, the right techniques, and appropriate products. By understanding the type of scratch and the type of leather, you can choose the best repair method and restore your prized possessions to their former glory. Remember to always test products in an inconspicuous area first and to seek professional help when needed. With a little care and attention, you can keep your leather looking its best for years to come.